I do a fair amount of DIY projects, several of which require a workbench. I, sadly, was lacking a workbench in the new house. I had two options, buy something pre-made that was “expertly” designed or design something exactly the way I want it to my specifications. I, obviously, went with the second option. Over the Christmas holiday Bryan and I decided that it was time to organize our workshop area which meant it was time for me to make my bench!
After some research I used this bench frame for my general concept. This was something new for me, not having an exact plan to go by. Or exact measurements. I’m used to carpentry where I have an exact plan and exact measurements. Where a blade width can cause a project to succeed or fail.
Going in, I knew two things. 1) I wanted it to be 36″ tall and 2) the bench top had to be a solid chunk of wood. Off to Home Depot we went! For the top I opted for an unfinished slab door that was 36″x 80″. This would provide enough room for a charging station and miscellaneous “stuff” to be located while still having plenty of work space. Next we figured out what we needed for 2x4s. We may end up with water problems in the basement so we wanted pressure treated wood for the legs. We ended up getting two pressure treated 10 footers and two non-pressure treated 8 footers. We also picked up some of 2 1/2″ screws and a set of countersink drill bits.
Roughly $90 later we were moving the supplies into the basement. Not surprisingly an 80lb door can be a bit difficult to maneuver, but it will be one heck of a solid bench! Next step was cutting all of the boards to length. We made the length and width of the supports shorter than the door to allow for overhang so it will be easier to clamp things to the bench. Here is the breakdown of parts and lengths (in inches):
(4) legs: 2x4x34.25
(4) side supports: 2x4x30
(3) front/back supports: 2x4x60
*Tip: Always label what a piece of wood is for after cutting it, that way you don’t lose track of a piece and cut it for something else*
After cutting the pieces to size, we assembled the four pieces that the top would be attached to.
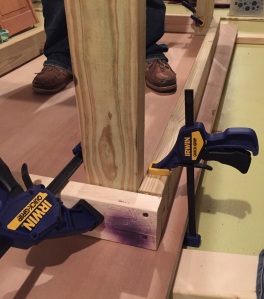
For added stability, and to eventually add a shelf, we had additional side pieces and a back. We wanted these to be a few inches off the floor. To do this, we stood the legs up in the corners of the box we formed for the top. Then we placed the second set of sides and back on top of the ones of the box we had just created. We then attached the legs to the second set of pieces.
Next we moved the top box onto the door. We flipped the leg assembly upside down and screwed the legs to the box. We did this on the door to ensure the legs were flush with the box frame.
Once the leg/frame assembly was completed we turned it right side up.
We placed the door on top of it and lined the back of the door up with the back of the frame. We made the the overhang on both sides was equal. After clamping the door to the frame we pre-drilled the holes and screwed the door to the frame.
We used the countersinks for these so that the wood would have a cleaner/flatter surface after being screwed.
Once the top was on we added some corner braces to add a little more stability. We applied two coats of a water based finish and were done!
Here is the finished product in position, waiting for me to work on my next project!


Cool! If I had room, I’d be doing something like that. But we just downsized from a 2000 sq ft home to a motorhome. No room for a workbench.
Whaat?!… and you do carpentry?!
I humbly bow to you!!